Tuesday, December 23, 2014

Colors of the season

I am such a sucker for a beautiful variegated yarn. Looking at the stack of Kaffe fabric in my stash, you will certainly understand why I couldn't leave the store without this yarn. Don't worry, I only get the urge to crochet about once every three years so when the mood strikes, I have to jump on it! This won't be turning into a crochet blog any time soon.

I started off telling myself I would just make a scarf. Then, if it went well I could change the plan. I'm not know for restraint, so now I'm on the third skein and about halfway to an afghan! It's warm and cozy though, even though it is slowing down my progress on the star quilt.
Yarn impulse-buy with afghan in progress on scrappy maple leaves runner.

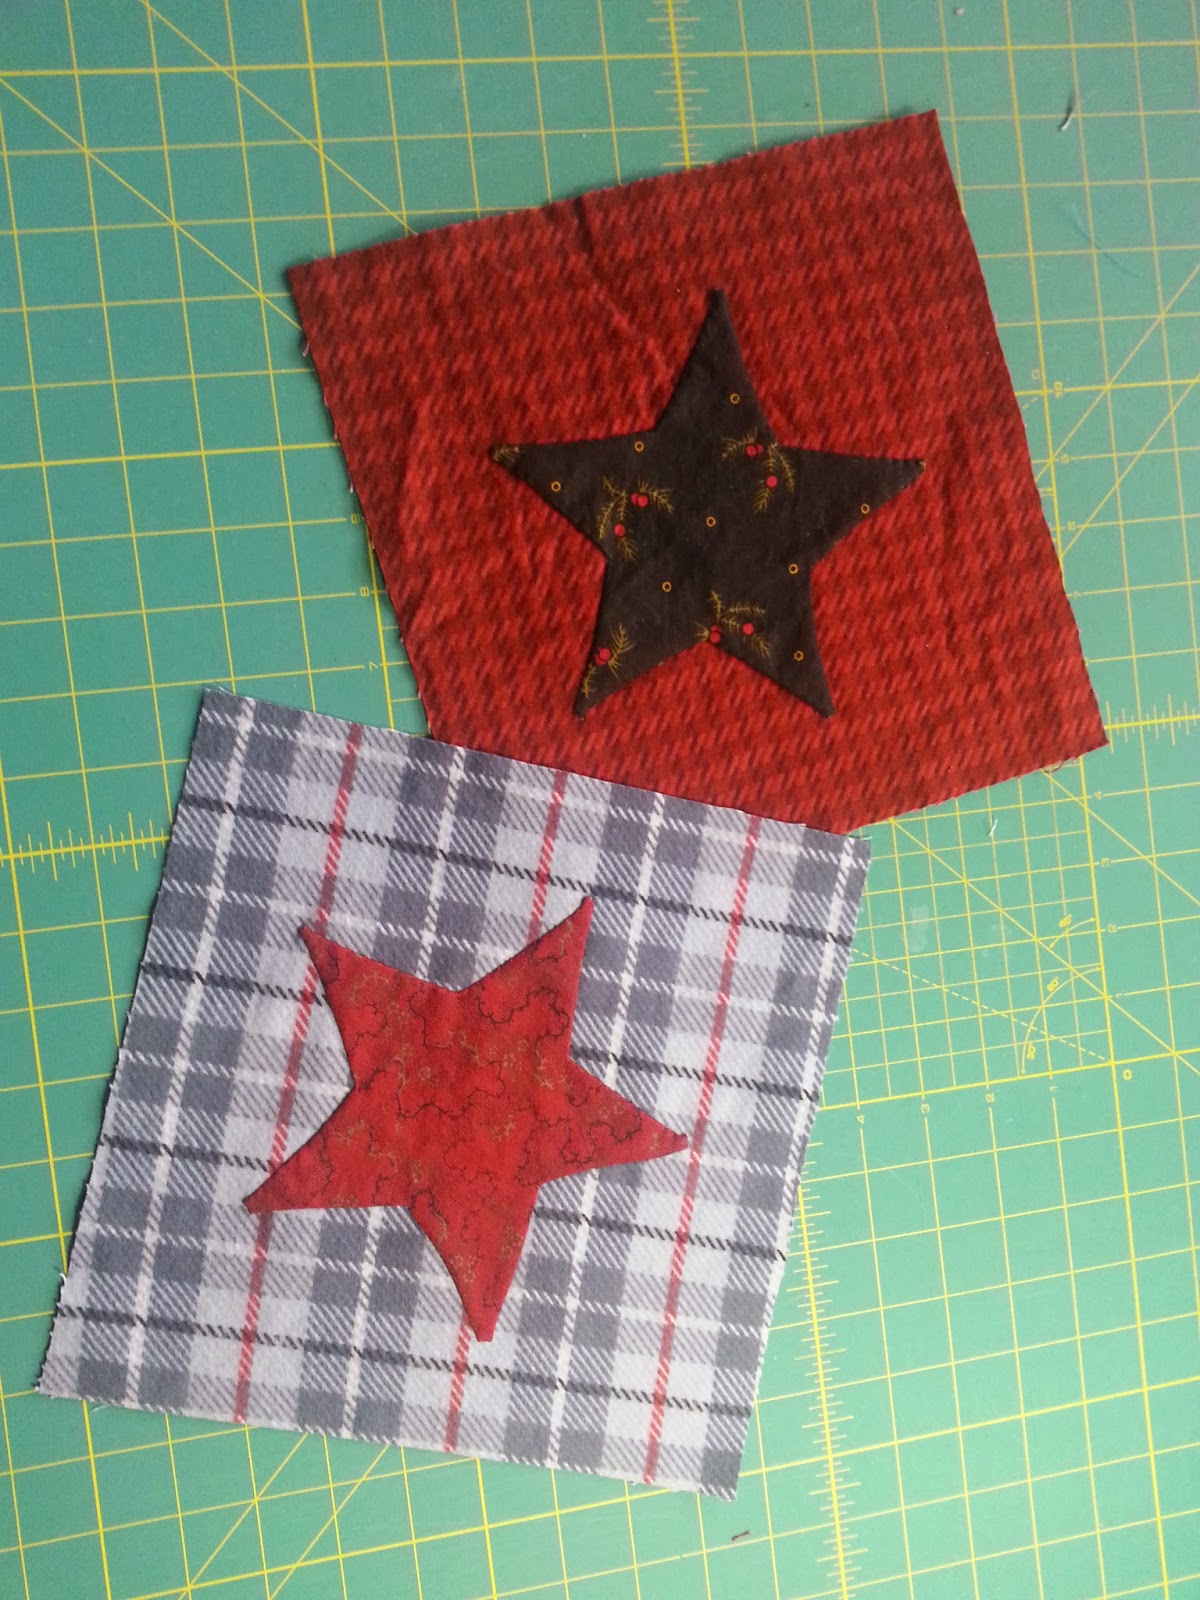
Just an update - applique star count is at 26...almost halfway there!

And in the midst of all of the hustle and bustle of the season, I was gifted these lovelies from a friend :) with a little help from Carol at Fabric-Etc. Thank you Tracey!

For all of you elves out there still diligently working away - happy eve of the eve and a Merry Christmas to everyone else! Hope Santa brings you some quilty goodness in your stocking!

Happy stitching,

Tonya

Monday, November 10, 2014

Seasonal stitching

It's true, this time of the year starts to bring lots of rainy, gray days to my neighborhood, but it also brings crisp, bright, beautiful fall days. Both kinds make me feel like quilting! I think I'm a pretty seasonal quilter, but my seasons don't always align with what's going on outside! This time though, my creative urges and the weather are going hand in hand.

I was inspired by these lovelies that I picked up on a recent mini-shop hop with a friend. I've been eyeing them for awhile, just waiting for inspiration to strike. Most of these are Woolies Flannels from Maywood Studio, but not all.

When it's dark at 5:00, I want to curl up on the couch for the night with some hand stitching. This time around, I was in the mood for needle-turn applique. I wanted blocks I could work on a little bit at a time with simple shapes. I do have a plan! But I'm not in any rush on this one.

I originally thought I would do the whole thing in flannel - but not having worked with flannel before, I was unsure how the whole applique thing would work out. After some good advice from friends and a google search about flannel applique nightmares, I decided it would be better to keep the flannel just for the background squares and use cotton fabrics for the applique. **Best tip I've learned: PREWASH your flannel in hot water and dry to get any shrinkage out the way before you spend all the time on your project!

After tracing my shapes on to the right side of my fabric, I've cut them out 1/4" outside of my drawn line. I like to use this applique glue, Roxanne's Glue-Baste-It, that you can usually find at your favorite LQS instead of pins. A couple of drops does the trick and saves my fingers from many extra pin pricks.


Here are a couple that are finished. I think I need 56 blocks for the layout I have in mind. Doing a few each night, they are actually going together quite quickly.

Hope you're feeling inspired!
Happy fall stitching,

Tonya

Sunday, September 28, 2014

A little bit of this and that

"Will work for fabric"
Can you see the sign she's holding? That even kind of looks like me. This was a snapshot of a quilt on display at Quiltworks in Bend, Oregon when I was there for the Sister's Quilt Show this summer. I didn't manage to note the name of the quilt or the quilter that this is from - but kudos if it's yours!

I would definitely love a red house. My house isn't red, but my front door is! I'm pretty sure I've wanted a red front door my whole life. At least that's what it felt like after my wonderful hubby painted it for me just recently. I love it! It's hard to remember what it looked like before (it was black) because now when I look at it, I think it should have always been red. It's the lipstick on the house for sure.

Entrance of Casa de Alexander
Well, sometimes life is like a perfectly organized stash shelf and sometimes it's a little bit more like a scrap bin. Mine has been more like the latter lately. But it is all good! Fall weather is quilting weather, yeah!

Happy fall stitching,

Tonya

Wednesday, August 13, 2014

Oh blogger, where art thou?

August? How can we be halfway through August already? Time sure doesn't seem to slow down - ever - does it? This summer has been so beautiful and I've been checking off my summer must/wanna-do list:

  • spent time at the lake
  • picked berries - made jam
  • visited Sisters Outdoor Quilt Show
  • hosted family friends for a visit
  • #1 son turned 16!!!!
  • and in between.....there has even been a little bit of quilting :)
Sherry's "Time to Sew!" project
This pic came in recently - Sherry T. was the winner of the Quilters World Winter 2013 magazine I gave away on the blog last fall and she actually made my clock project that was featured inside! Hers turned out great, don't you think? I love what she did for the center and she used a fun selection of fabrics for her blades.

***Super important correction notice - if you make this, there is a size correction on the fan blade template that was printed in the magazine. The fan blades need to be cut to 3 1/2" , not 5" as shown on the template. You can still use the template, you just need to trim the blade to 3 1/2", cutting the extra off the top wide end of the blade or your Dresden plate will be too big for your frame!

Last month, I was lucky enough to join a fun group of ladies at the Sisters Outdoor Quilt Show. So fun. So hot. So many quilts. Definitely put it on your to-do list if you haven't been there before for the show. It's a real treat to see so many bright, beautiful quilts hanging outside. I just snapped pics with my phone so they're not the greatest but here are a few....No shortage of beautiful inspiration everywhere.
June Jaeger
The Stitchin' Post


From the teacher's tent...
Sue Spargo
Scott Hansen
Jackie Erickson
Anyway, that's a bit of a catch-up from me. This week is fair week and I can't wait to see the quilt exhibit. I didn't get anything in myself this year due to other deadlines but lots of my quilty friends I'm sure will not fail to please and inspire. Maybe my next post will even be sooner than a month from now - yikes!

Happy summer stitching,

Tonya

Friday, July 4, 2014

Red white and blue revisited...

This holiday time of year just begs me to pull out the RWB scraps and make something, anything! Unfortunately for me, the projects I have on the front burner at the moment are anything but RWB, so I'll just have to enjoy some blasts from the past...Here's a look at some past projects to fuel your Independence Day spirit...


Tumbler made for one of my awesome aunts...

Scrappy stars (mine on the left) made for Quilts of Valor project...

This one is from Sandy Klop's book Quilts for All Seasons, made for my dad.
This is a Minnick & Simpson pattern called "Chippewa Nine Patch". It was strip piecing therapy for me and I loved every minute of making it.
No wonder I have so many RWB scraps! So whether you're out enjoying a parade, the fireworks, a BBQ, time with family and friends or just some pleasantly "pieceful" stitching time - Happy Birthday America!

Tonya

Thursday, June 19, 2014

Shirts to sleep under

Here's a project I finished up recently - a t-shirt quilt for my friend's son. I was waiting until it was gifted to them to share the pics. She sent me a box of baseball team shirts and gave me free rein (or maybe I should say, free reign) to do anything I wanted with them. Fortunately, they were happy with the result!


I have now made a grand total of TWO  t-shirt quilts in my life so I wouldn't necessarily consider myself an expert, but I do have a few hints I can share. They can be fun to make, but there are a few things that make them different - most importantly, the fabric you are working with.
The first step is to determine what you have to work with and then what you are going to do with them. The ten shirts I had were the mostly the same, differing by # and sponsor name for each year. The shirts also varied a little by size since they covered many years of kids' baseball. I also figured I could use the Mets name logo and there were some small patches on the sleeves that I worked into the corners and the nine-patches. From the pic above you can see my 12 1/2" square ruler fit nicely over the number so I knew I would most likely be working with 12 1/2" blocks. The height on the Mets logo was about 6-7" so that would work well into the border. Here's a look at my game plan going in:
Very high tech design process, I know. The only fabric purchases I needed to make this work was for the sashing, backing and binding. The cornerstones and nine-patch fabrics were from my stash.

Before you actually cut your squares out from your t-shirts, you need to stabilize them - this is a must. T-shirt material is kind of dicey to work with anyway and I can't even imagine trying to make one of these without stabilizer. I used a lightweight iron-on fusible stabilizer from Pellon but there are many available.
I cut my fusible squares about and inch or so bigger than my final block size to give myself some wiggle room for centering.

Here's a square of fusible on the wrong side of the fabric, centered over the # logo.
Follow the manufacturer's directions for ironing on your fusible for whichever one you choose, but I highly recommend using a pressing sheet or a scrap piece of muslin over it while pressing to keep your iron clean. Also, be sure your iron isn't too hot. If it is, the fusible will shrink right up, distort and just about melt (ask me how I know.) I also skip the steam. Wet fusible isn't a good idea either. Once the fusible is ironed in place, trim down your block to the final size, in this case 12 1/2".
Voila! This block is ready to go!
I repeated the same process with different sized pieces of fusible on the Mets logos and the sleeve logos. O.k., now to the design wall. Here's how it looked in process...
At this point, I was trying out fabric for the sashing and figuring out the borders. Striped fabric works really well for sashing, especially if you are working with plainer t-shirts. Other hints for piecing these: I still used a 1/4" seam allowance throughout and I pressed my seems to one side as opposed to open. If you use a light enough fusible, you won't have any trouble with extra bulk.

From the beginning, I thought the backing for this quilt would be baseballs but on multiple trips to the shops, nothing was jumping out at me. (I almost always buy fabric for my backs after I've finished the top - mainly because I don't always know what the finished size will be. My plans often change midway through :) But in this case, I went with this fun sneaker print that I found at my LQS, Fabric-Etc.:
I used the same striped fabric for the binding and the sashing (also from Fabric-Etc.) Stripes are also a favorite of mine for bindings. The water motif quilting was done by my awesome LAQ - Tracey. She did a great job, as always. :) The finished quilt ended up being about 52"x65".

Maybe the best thing about a t-shirt quilt, is that they are instantly user-friendly. The t-shirts have usually gone through many washings before making their way into the quilt and the t-shirts are personal and special to the person who wore them. So it makes an especially nice way to give them back to that special person in your life, the memories they capture and the future good naps they ensure.

Happy stitching,

Tonya


Tuesday, June 10, 2014

Time to set the table


My scrappy summer table runner project continues. Here's the layout option I chose:

Original option #7

quilted, bound and ready for the table.

I quilted it free motion using Leah Day's pattern called "Paisley". If you haven't checked out her website - DO! It's awesome. She does great demo videos, tons of designs and she shares all of her knowledge for FREE! It's a great resource.
Half-way there...

The Paisley design I chose was very fun and pretty easy. Of course, the longer you do it, the better you get. I had some speed issues on the widest curve but overall, I was happy with my FM effort this time around.

After quilting, I decided to round off the edges. This is super easy to do using an everyday dinner plate. I just lined up the edges at each corner and chopped them off! The only other thing you have to do differently is to use binding cut on the bias so that you can bend around the edges.
No measuring necessary - just make sure the plate touches both edges.

the bits...

the finished project in its new home

Cost for this project:
scrap 1 1/2" strips: 0
scrap batting leftover from a bigger project: 0
1/2 yard backing taken from stash: I'm counting this as 0 since it was at least 5+ years old!
fat quarter from my stash for the binding: 0

= a totally free project!

(The most expensive thing on this table now is the awesome, hand-painted wooden platter I scored at a garage sale a couple of weeks ago for $1! Got to love that!)

Happy summer stitching,

Tonya

Friday, May 30, 2014

A garden of options

My garden inspired scrap project continues.

Have I mentioned yet today how much I love the log cabin block? One of the things that make it such a great block is that it works on it's own and in a big setting. I think it's very interesting how the effect of having only two rows has on a block. The overall design affect is very different than a big quilt that can carry a secondary pattern. Sometimes I look at a block design and think it's nice on it's own - or nice when there are a bunch of them and you get the overall effect. But the log cabin really works both ways for me.

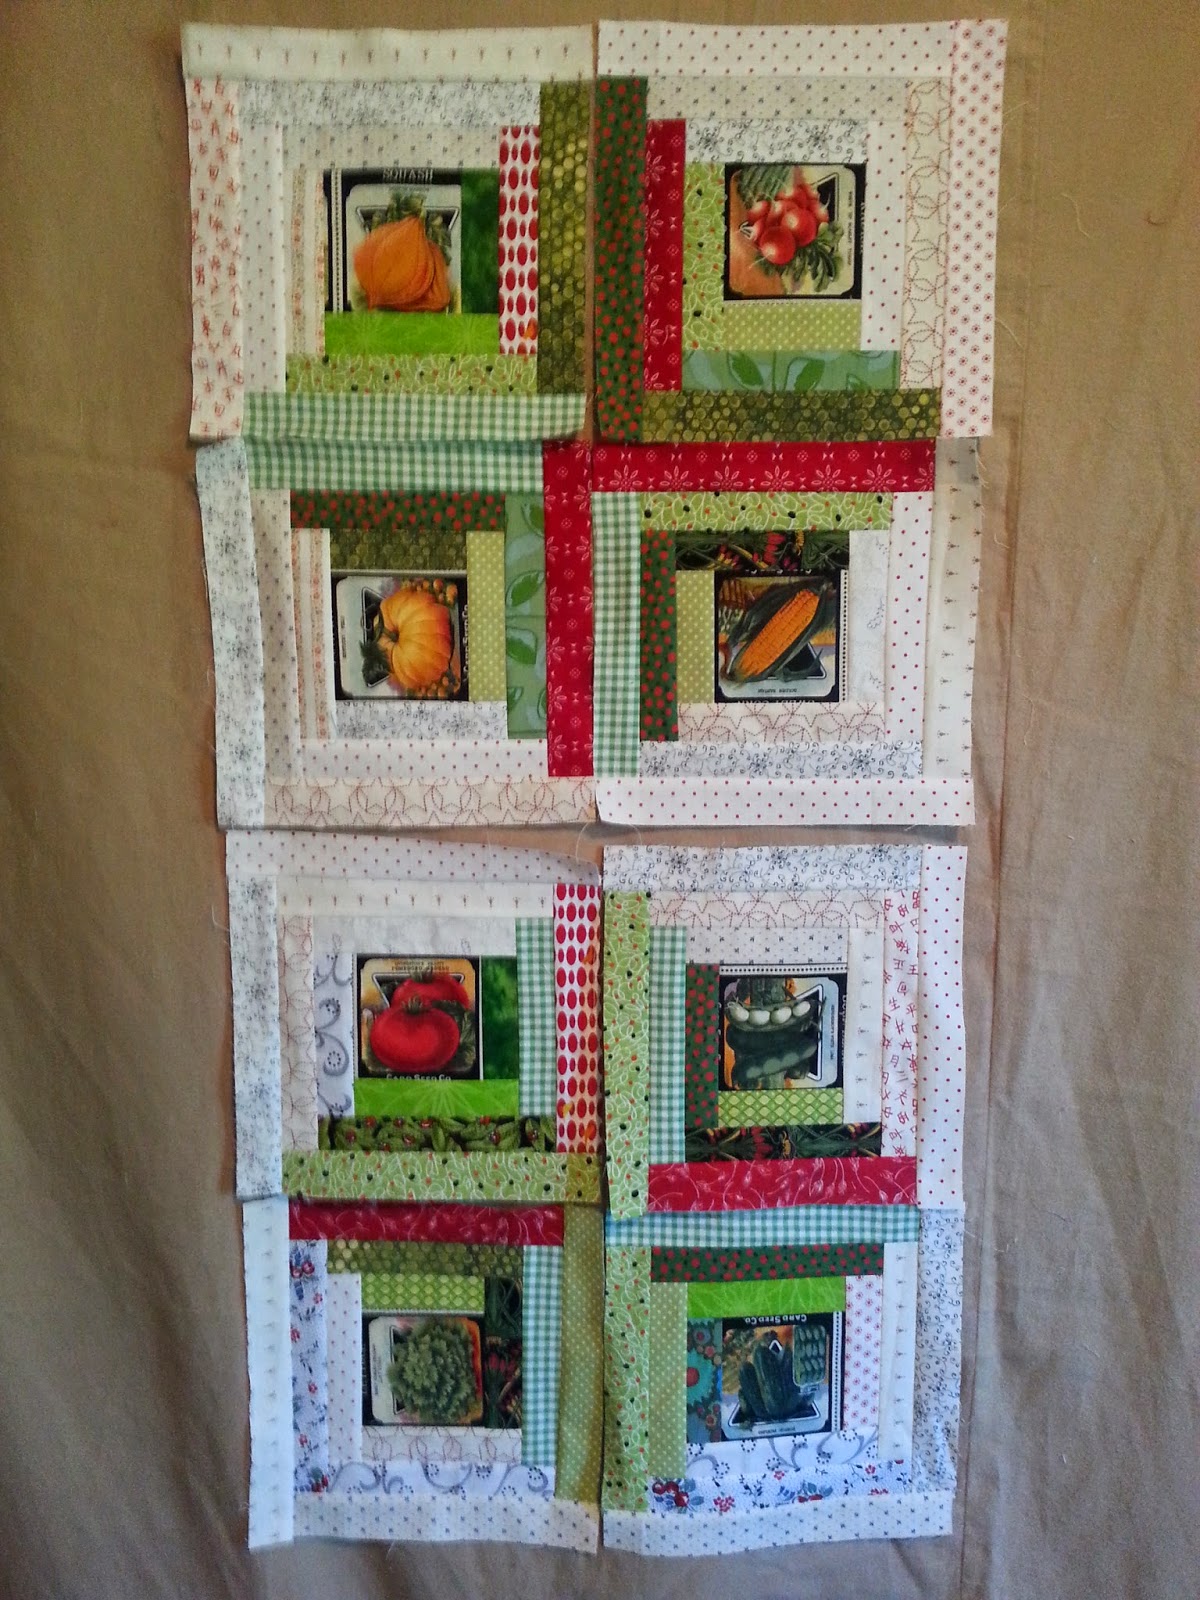
O.K. My eight blocks are made. Decisions, decisions. Here are some possibilities for the layout of my table runner:

Option #1
Option #2

Option #3
Option #4


Option #5

Option #6

Option #7

What do you think? Hard to pick just one, I know!

And how are we doing in the Christmas category? When I pulled out the scraps for this project I was pondering whether I could do a red/white/green project and not have it scream Christmas. I think the jury is still out on this project but the tipping point may come with the quilting and the binding. Stay tuned...

Happy scrap stitching,

Tonya

Tuesday, May 27, 2014

Garden inspiration

Man, oh, man. The weather in my corner of the world has been beautiful lately. There has even been reported sightings of the S-U-N!!! (Well, o.k., not this last weekend - but before that!) It's also been time to get my veggie garden going. So I've been out weeding, and tilling, and weeding, and raking, and weeding, and planting....know what I mean?

All of this outdoor stuff cuts into my sewing time a little bit but that's o.k. It's also a great time to get some inspiration from the garden and use it on some smaller, more manageable projects. Especially scrappy ones!

I had a simple log cabin table runner in mind. What's not to love about the log cabin block? It's the queen bee of scrap thriftiness. Here are some of the scraps I pulled out - all 1-1/2" strips:

Can green and red be your main colors and not look like a Christmas project? I think so, but I think the key is the ratio of each. If you have equal amount of red and green, you might as well put a ribbon on it and put it under the tree. My plan is to use about 90% greens and white/lights with about a 10% accent of reds. Just about as much as you see in the picture. We'll see how it turns out!

Next, I'm adding some fussy cut 4" squares from a fabric featuring seed packets I had leftover from a different project:
(This fabric was so cool. It's an older fabric from a line called Annie's Farm House by Holly Holderman of Lakehouse Dry Goods. I bought and used it for some placemats I made for my mom a couple of years ago. The seed packets in the print feature the Card Seed Co. that was located in Fredonia, N.Y. - very near the little town my mom grew up in. If you click on the picture above, it should enlarge so you can see the print better.) Just for fun, check this out...

Anyway, back to the blocks! I'm using the fussy cut 4" squares as the center of my log cabin blocks and using the strips on light and dark sides, ending with white so it seems a bit more "summery". (Is that really a word?) I went out 3 logs on each side so I finished with a 10" block.


My plan is to make 8 blocks and try some different layouts but I should end up with a 20"x 40" runner for my oval kitchen table. I'll be back soon with some layout options!

Happy summer stitching,

Tonya


Tuesday, May 20, 2014

Tickled Pink Take 2

Here's a little sew and share for you today. I had an email question a while back from Cindy about a border fabric I used in my Tickled Pink quilt that appeared in McCall's Quilting last July. She also shared a great idea for how she planned to make her version even more special for her little girl. She writes...

"...My daughter had a cat for 15 years and Tippy had an old pink quilt that she slept on. Tippy passed away last year and my daughter won't part with the old quilt that Tip slept on. It is very faded and threadbare. I work with a lady at Mayo Clinic who makes beautiful quilts as a hobby so I asked her if we could make a quilt and use Tippy's quilt for the inside material. That way my daughter would always have Tippy's quilt with her but inside a new quilt. When I suggested this to my daughter she was thrilled with the idea..."

I think that's such a great way to bring together the old and the new memories - all through a humble quilt. And look at the smile on this little cutie's face! (The little fur-baby in the corner looks like a keeper too!)
Cindy's friend and co-worker Rita made the quilt for her (nice friend! - hope you'll catch the quilting bug too Cindy!) I love the selection of fabrics chosen for your blocks. Thanks for sharing such a sweet idea for honoring memories through our quilting.

Happy stitching,

Tonya

p.s. If you were curious about the border fabrics on this one too, the inner border is a Brandon Mably fabric from Westminster called Shingles and the outer border is Magenta Miami by Philip Jacobs.

Friday, May 9, 2014

Practice makes....not quite perfect, yet.

I have been quilting for about 10 years now and I have a love/hate relationship with free motion quilting. There. I said it. I want perfect stitches, smooth curves, even patterning and balanced tension. Right now. Is that too much to ask? Probably. After all, even after 10 years of making quilts, I haven't spent all that time honing my free motion skills. It's usually the part of the process that I have enjoyed the least - and spent the least amount of time on (so why am I surprised at my results?!) So I've been trying to take my own advice and spend some little snips of time practicing.

I have done my own quilting on many projects in the past up to twin size and I have also loved, loved, loved the talents of my favorite long arm quilters (and will continue to!) But I still want to improve my free motion skills and my main motivator is simply so that I enjoy it more!

Nothing big, nothing stressful. Sometimes just extra orphan blocks I have left over from a project, sandwiched up. I like these little minis because there's no stress and I can practice quilting designs without stressing about ruining a bigger project. It's a good time to test the thread color effects on different fabrics and block patterns. And the small size makes them very manageable under the machine.

Free motion practice, meandering with  loops
Here's the back (just batting, I didn't add a backing fabric on this one) but you can see the design better.
Under the machine, grippy gloves on - this means business!
For me, part of the success or enjoyment of free motion is becoming one with the machine! I basically have sewn on two different machines. They each seem to have distinct personalities, thread they like or don't like, certain stitches that go smooth as butter, and then others that are a thread-breaking nightmare.
This is what happens when I get too impatient and get lead-footed on the pedal.
 Tension issues!

This was the second pattern I practiced on today - kind of like a shark's fin, palm tree kind of motif. 
So to all of you fellow aspiring free motion quilters, I say, practice, persevere and may the force be with you! You are not alone! If you are anything like me, cut yourself some slack. At the end of the day, you are probably way more critical about your work than the folks that are receiving the lovely quilts you are making for them.

Happy stitching!

Tonya